

The July 2011 League City Photography Meet up took place on 7/7/11. Below are my notes.
Announcements
Upcoming Events
- Jul 13 Wed 7:00 PM | Photoshop Social
- Jul 15 Fri 6:30 PM | Full Moon A Risin'
- Jul 23 Sat 4:30 PM | Portrait Shoot (looks to be full)
- Aug 28 Sun 12:00 PM | 18th Annual Theatre District Open House
--
Topic – Tips from the Digital Photography Book Series
David gave a great presentation that involved several tips from Scott Kelby's Digital Photography Book Series.
Tip #1 - Photographing Landscapes
- When photographing landscapes, it is good to have something of interest in the foreground, middle ground and background
- Landscape shots are best taken at F16 - F22 to get the greatest depth-of-field possible
Tip #2 - Initial Checks
WHIMS (checks to perform before every shoot)
- White balance
- Highlight warnings
- ISO
- Mode
- Size (of the image)
Tip #3 - Importance of Trippds
- Major discussion on the importance of tripods. Trudy and Scott displayed their tripods. Carbon fiber is the way to go for lightness.
- Some tripod brands mentioned
Tip #4 - Sharpening
- Sharpening after the fact - unsharp mask - Edit/Fade - Unsharp Mask - Normal to Luminosity.
- Since I did not get good notes on the sharpening topic, I found a good explanation of sharpening in Photoshop on the following site: http://tresdesi8.multiply.com/
Here is what they say:
We sharpen every single photo we shoot using Photoshop's Unsharp Mask filter. Okay, it sounds like something named "unsharp" would make your photos blurry, but it doesn't the name is a holdover from traditional darkroom techniques, so don't let that throw you. Using it
is easy. Just open your photo in Photoshop, then go under Photoshop's Filter menu, under Sharpen, and choose Unsharp Mask. When the dialog appears, there are three sliders for applying different sharpening parameters, but rather than going through all that technical
stuff, I'm going to give you three sets of settings that I've found work wonders.
For people: Amount 150%, Radius 1, Threshold 10 1.
For cityscapes, urban photography, or travel: Amount 65%, Radius 3, Threshold 2 2.
For general everyday use: Amount 85%, Radius 1, Threshold 4 3.
Tip #6 - Lenses and Filters
- Be careful with lenses in dusty conditions. If it is really dusty/windy...don't change lenses. Other times, just make sure you situate your camera and lens so the rules of gravity do not draw dust. Hold the camera pointing downward when changing lenses.
- UV filter has a chance of protecting your high dollar lenses from some damaging situations. There are definitely two different churches when it comes to using a UV filter or not.
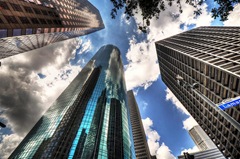
Tip #7 - Urban Shooting
- Don't try to capture it all...capture details
- Get closer to your subject
Tip #8 - Shooting Modes
- Aperture Priority - You adjust the aperture and the camera sets the shutter speed (good for most shooting situations)
- Shutter Priority - You adjust the shutter speed and the camera sets the aperture (good for shooting sports)
- Manual - You have control over both Aperture and Shutter Speed
- Program - The camera controls all (Point and Shoot)
--
Additional Information & Links
- Photo Tips: Buy the right Tripod
- Photo Tips: Tripod Tidbits, Part Deux
- Google search for Online Photo Editors
- Picnik - Photo editing made fun
- PixLr - Photo Editing Services
- OneTalentSource.com - Professional Portfolio Hosting Site of Models and Actors to network with Professional Photographers, Make-Up Artists, Designers and Agencies.
--
Photos I took to the meeting

--
“To me, photography is the simultaneous recognition, in a fraction of a second, of the significance of an event.” - Henri Cartier-Bresson