Tutorials

Sepia Tones in Photos

I ran across a good article from Light Stalking recently titled Why Sepia Photography Still Kicks Ass. It made me realize …there are so many ways to add a sepia tone to photos. Of course, some methods are better than others and everyone has their own opinion on what makes a better photo.

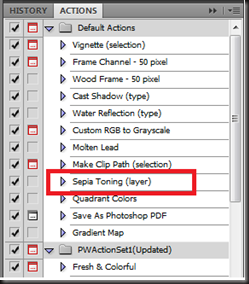
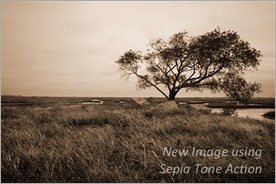
My favorite method that I have found so far is Sepia Toning action included with Photoshop. It does a pretty nice job.

action

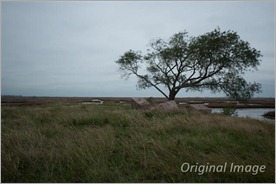
DSC_0126B-4 - CopyDSC_0126B-4--sepia - Copy

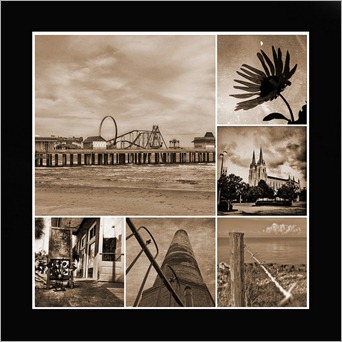
Other photos converted using the Sepia Toning action

7170468399_39e7b98566

Below are other methods of converting to Sepia that I found in my research –

  • Method 1 – Hue/Saturation adjustment layer
  • Method 2 – Channel mixer/color filter
  • Method 3 – Adjustments and variations
  • Method 4 – Photo filter adjustment layer
  • Method 5 – Gradient map adjustment layer

Check out my About.Me page for my complete web presence

Photo Collage Templates for Photoshop

My friend Katherine introduced me to some awesome storyboard templates from a company called GingerPixel. They are basically a set of PSD files that you open in Photoshop, add/arrange photos and save. The full instructions on downloading and using the templates can be found HERE. It can be a little time-consuming, but it is the easiest tool I have used to create collages.

There are eight different arrangements to chose from. 

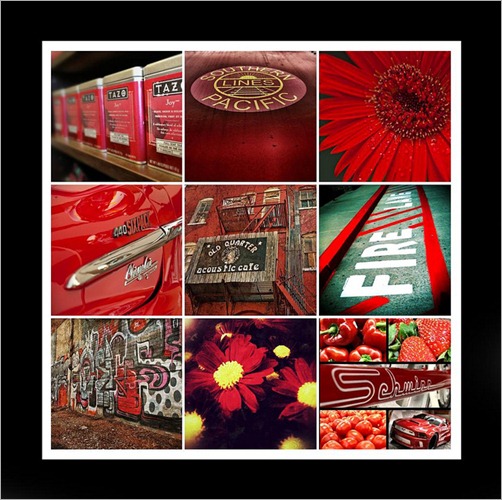
Below is a “Red” themed storyboard that I created using the Nine Square Grid template. The templates all have a white background. I played with the background color after flattening the file to a JPG image.

red-story

Link Summary

--

A photograph is usually looked at – seldom looked into." -Ansel Adams

Check out my About.Me page for my complete web presence

LCPG Monthly Meeting – 02.02.12

The February 2012 League City Photography Group’s monthly meeting took place on 02/02/12. Below are my notes.

Announcements

Upcoming Posted Events

Other events

Topic – White Balance

Mike Fisher gave a detailed talk titled “Raw Files and White Balance or …Do you trust your histogram”.

Summary ::

A gray card reflects all the light falling on it in equal amounts.

Your camera’s light meter essentially sees the world as a gray card and will try to set the exposure so that the average brightness of all the things in the image is the same as the brightness of a gray card.

Most digital sensors use a Bayer filter to record an image.

Your camera’s sensor records a set of three numbers at each pixel site – one for the brightness of the red light falling on it, one for the brightness of the green light, and one for the brightness of the blue light.

Differences between JPEG and Raw

    • JPEG uses eight bits to record a brightness level. That means each value can range from 0-255.
    • Raw files, depending on the camera, use twelve or fourteen bits to record a brightness level. Using twelve bits means the values can range from 0-4095. Using fourteen bits allows the values to run from 0-16383.

Color Spaces: Most cameras will allow you to set a color space, usually sRGB or AdobeRGB. The camera usually defaults to sRGB. Raw files themselves don’t have a color space.

Histogram: Even when you shoot raw, you still get a JPEG. That’s because the camera develops a JPEG using the white balance and camera profile information you set. The histogram the camera displays is based on that JPEG, not on the raw file.For that reason, the histogram may not correctly show the light levels actually recorded by the sensor.

Link to Mike’s presentation slides: Raw Files and White Balance or …Do you trust your histogram

--

Additional Information & Links

--

Photos from the Group

Jan2012

--

“There is only you and your camera. The limitations in your photography are in yourself, for what we see is what we are.” -Ernst Haas

Check out my About.Me page for my complete web presence

LCPG Monthly Meeting – 01.05.12

The January 2012 League City Photography Group’s monthly meeting took place on 01/05/12. Below are my notes.

Announcements

Upcoming Posted Events

Other events

Galveston Featherfest – Apr 12-15

Topic – ISO

David Paulissen  gave a great talk and review of the article What is ISO? from the Photography Basics website.

Summary ::

ISO is actually a common short name for the International Organisation for Standardization.

100, 200 or 400, 800, 1600, ect -- refers to the film’s sensitivity to light

Low sensitivity means that the film has to be exposed to light for a longer period of time than a film with a high sensitivity in order to properly expose the image. With a lower sensitivity you also get a better quality image too which is why you should always try and use the lowest sensitivity you can get away with.

A high ISO setting is needed for indoor work, where flash isn’t allowed and the light levels are fairly low. Or you can use it deliberately to get the grainy gritty feel to the image.

Link to Original Article: What Is ISO?

--

I provided a handout listing my favorite photography podcasts

Suggested Photography Podcasts

Full list -- http://rtiptonphoto.com/photo-podcasts

--

Additional Information & Links

--

Photos from the Group

Dec

--

“All life is of a past nature, photography enhances this fact.” – Patrick Summerfield

Check out my About.Me page for my complete web presence

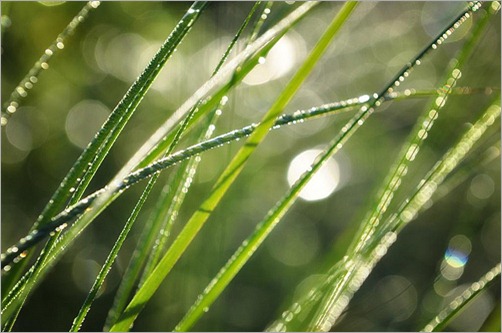
Bokeh: What Is It?

6513665725_1911685c89

Wikipedia defines bokeh as follows:

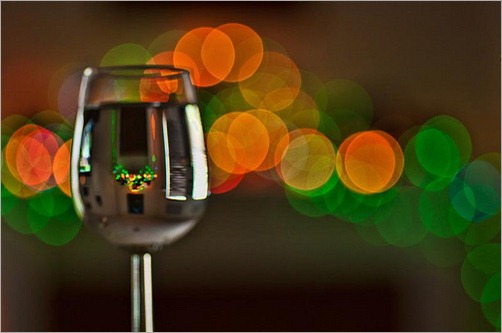
bokeh is the blur, or the aesthetic quality of the blur, in out-of-focus areas of an image, or the way the lens renders out-of-focus points of light.

The normal shape of the out-of-focus points of light is round or octagon because that is the shape of the aperture.
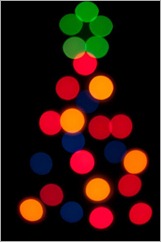
6523936297_aed2883512

The photo above is one of those lawn decorations that is in the shape of a Christmas tree. Just aim, make it out of focus and presto, you have bokeh. Now the photo would be more impressive with an object in focus in the foreground, but I like pretty lights. <wink>

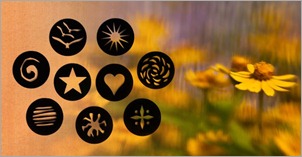
Lensbaby has a set of creative aperture discs that produce different shaped points of light (ie heart, star). You can also make your own shapes using some blank discs that come in the set. These only work with the Lensbaby systems.
lensbabycak

If you want to do creative aperture with normal lenses, Photojojo has an SLR Bokeh kit that has many more shapes available.
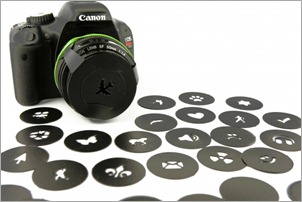
bokeh-Kit-d47c_600.0000001297539170

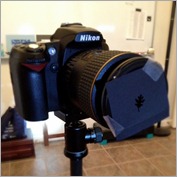
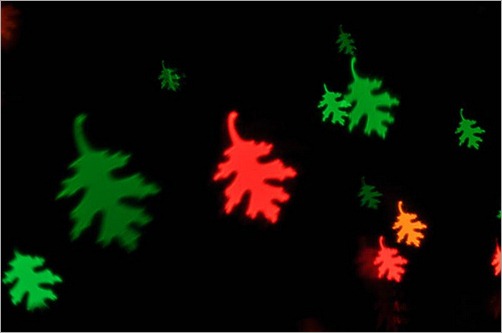
I conducted an experiment in which I went to Hobby Lobby and picked up one of those paper punches used for scrapbooking. I picked a leaf shaped punch. Took some black construction paper and punched it, then taped it to the front of my lens. Presto, it worked. I was able to obtain leaf shaped point of light.
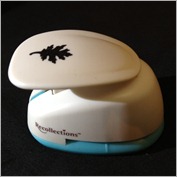
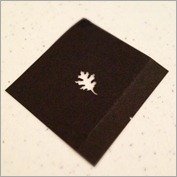
photo (2)photophoto (1)

6523936351_ef3ec10361

Check out my full gallery of Christmas light bokeh on Google+

This is a great time of year to play with bokeh because of the abundance of Christmas lights, but it is actually fun anytime of year.
6251206405_80bf2f02b6

--

Additional Information

--

Happy shooting.

“If you see something that moves you, and then snap it, you keep a moment.” – Linda McCartney

Check out my About.Me page for my complete web presence

Great Tutorials on Shooting Different Times a Day